The third icon is the rotate tool. This lets you rotate an object along any axis. To use this, select your object and then select the rotate icon. This will bring up three circles around your object, as well as a rotate window. Any of the circles can be clicked and dragged around to rotate your object along that axis. You can also input a certain number of degrees along one axis in the rotate window. In the rotate window, there is also a button titled “Lay Flat.” This will automatically orient and lay your object down on the flattest part that Cura can find. This is especially useful if your object is at an odd angle you can’t rotate by hand or an odd geometry. Try to rotate using the tool first and use the lay flat tool last, as sometimes it can be buggy.
Rotating your object to the best position is important in 3D printing. Try to orient your object in such a way where there is a flat part on the build plate, no large bridges or overhangs, or parts in midair. Many times achieving all of these criteria is not possible, but this can be fixed with other settings later on (like supports and build plate adhesion).
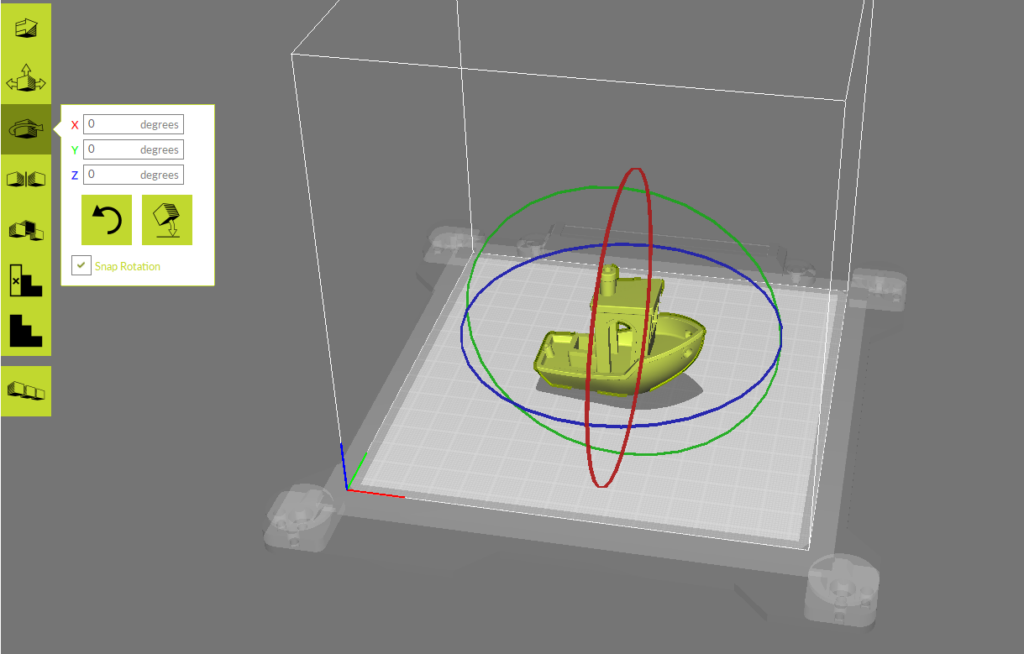
This is an example of a good orientation for an object. There is a flat surface being printed on the build plate, no steep overhangs, and nothing being printed in midair.
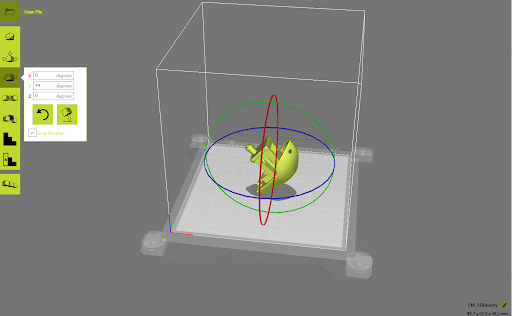
This is an example of a bad orientation for an object. The surface being printed on the build plate is not very flat and has a small surface area, there is a very large overhang, and a few parts that would be printed in midair.