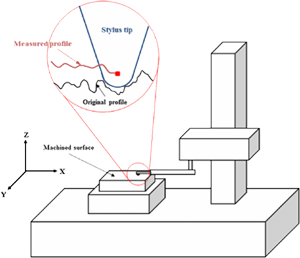
Stylus profilometers use a cantilever style probe to glide along the surface of a relatively flat object to acquire data related to the features of that surface. This is done electro-mechanically with a feedback loop that measures the tip displacement from the sample pushing up against the probe as it scans along the surface by means of a Linear-Variable-Differential-Transformer (LVDT). This produces an electrical signal which corresponds to the surface variations of the sample. Upon processing the data, the software then interprets the data visually by providing a 2D scan of the change in signal. “Stitching” multiple scans together can also be used to generate a 3D surface profile of the surface if desired.
Stylus profilometry requires force feedback and physically touching the surface, so while it is extremely sensitive and provides high Z resolution, it is sensitive to soft surfaces and the probe can become contaminated by the surface. This technique can also be destructive to some sample materials which may be very soft.
The stylus profilometer involves physical movements in X, Y, and Z while maintaining contact with the surface, it is slower than non-contact techniques. The stylus tip size and shape can influence the measurements and limit the lateral resolution (see application notes).
 Schematic of Basic Stylus Profilometer Principle